Time flies when you’re having fun

The past two weeks have seen zero construction activity.  We were a host studio for Hidden In The Hills Studio Tour.  This takes place every year Thanksgiving weekend and the weekend before.  This year there were 44 studios (all in the Cave Creek/North Scottsdale area) and 170 artists.  We had 5 guest artists who have been with me for several years.   Even though no buildings were up they appreciated being on concrete slabs.  Just under 1,000 people visited out place with much excitement about the artwork and the home project.   I posted the following description on the kitchen container so folks could get a feel for what we are doing.  Now back to construction.

Our Desert Nest – A shipping container home

Our goals: low energy use, low water use, minimal impact on the desert, using recycled materials as much as possible.

Paul Diefenderfer and Maggie Sacher, his wife, designed the house and are doing all the building with help from a few friends.

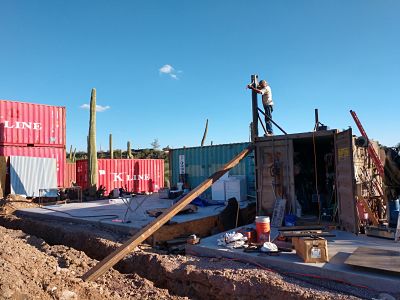
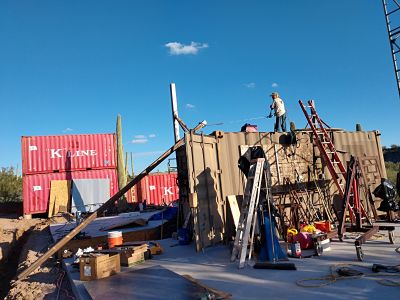
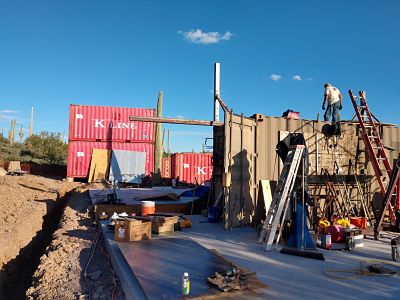
The big space between the six 8 by 20ft containers will be framed in at both ends with steel beams and glass. This will be the great room. As you enter the house it will get wider and taller. The first container on the right will be the kitchen. Most of the side wall will be removed so that the kitchen flows into the great room.   The far right container will be the laundry room and guest bathroom.   The first container on the left will be the bedroom. The outside wall will be pushed out 5 feet to make the room 13 feet wide. The far left container will be the office. The two upper containers will be closets/storage.

There will be a staircase that goes up the wall of the far right container with a bridge and catwalks for access to the upper containers. The stairs, bridge and catwalks will be made of perforated steel so you can see through them and will have forged iron vine railings. The roof of the office and guest bathroom containers will be mezzanines inside the building.

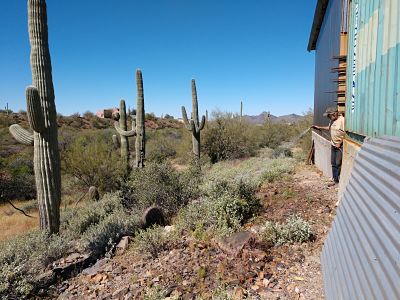
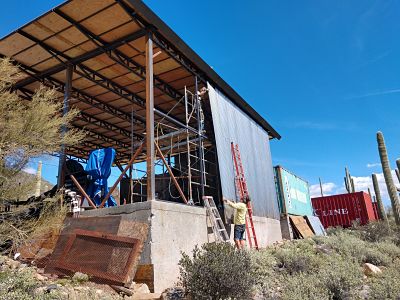
The primary roof will be flat with exposed trusses. We will be using recycled blue jean scrap insulation by Bonded Logic.   This insulation will be exposed so the ceiling will be a light blue color. There will be a secondary shade roof over the entire house. We will be installing bat habitat between the two roofs because you can never have too many bats.   During the winter the lower sun will come through the south windows to help heat the house. The east and west walls of the house will have rock gabion walls about three feet out from the containers. These walls will have openings for the door and windows and will keep the building in the shade. Keeping the building in the shade will make it much easier to cool.

The tile covered concrete floors will have tubing in them to circulate hot water in the winter and cool water in the summer to provide most of the temperature control. The hot water will be produced with solar panels and the cool water with a heat exchanger in the ground.

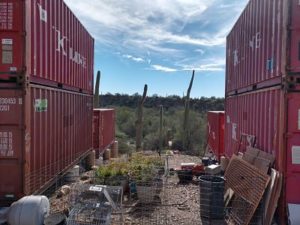
Other than the space in front of the house that has been dug up for the septic tank and leach field you will notice that the desert has remained untouched just a few feet away from the house. This has created many challenges as the space to move materials and equipment is limited. The end result will be worth it. This area over the leach field will become our courtyard.

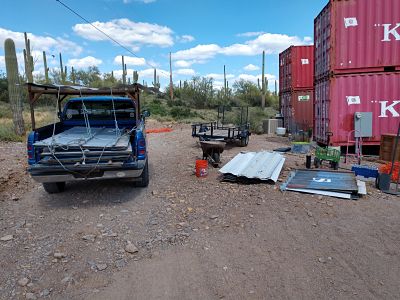
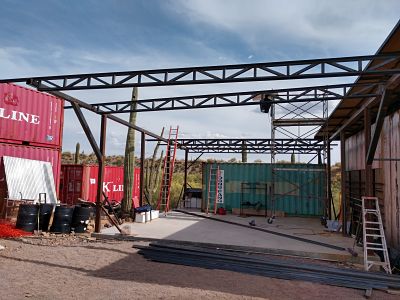
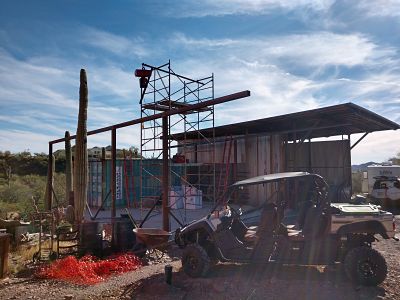
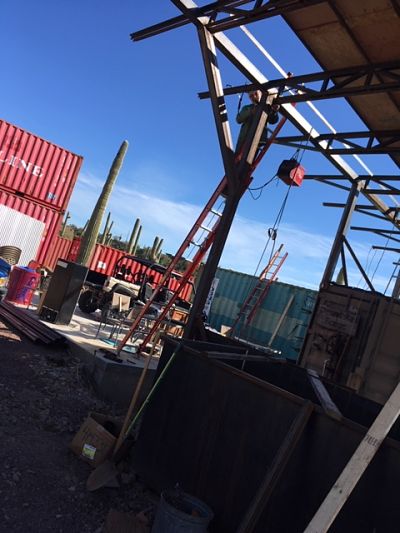
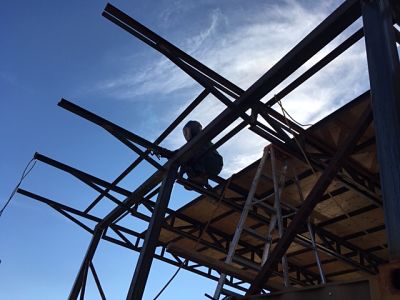
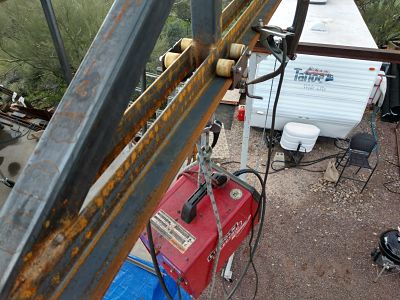
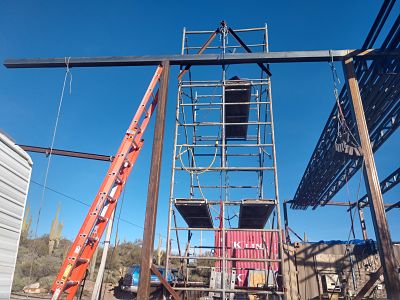
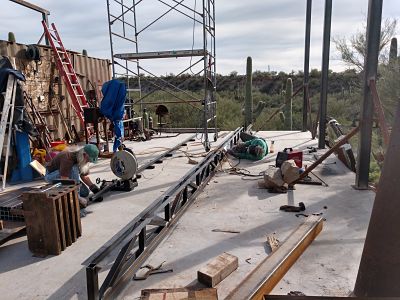
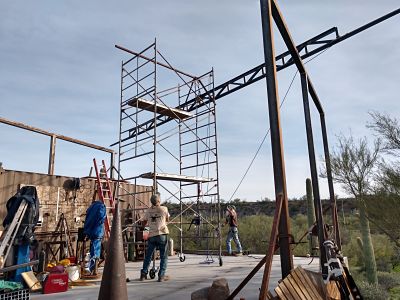
The 26 by 30ft concrete pad just west of the house will be the garage. The 30 by 30ft pad west of the garage will be the shop. The 40ft trusses you see sitting on the wall frame are built on the floor and raised up using the rolling scaffold and rescue rope winch. It takes just one person to raise and place the trusses. This same system will be used to install the 52ft long trusses for the house.

Trusses

I got the first two horizontal beams up and started on the trusses.


Making the first of 7 trusses for the shop.


Using a rolling scaffold and my rescue rope winch the truss is raised.


Once it is above the support beams the scaffold is rotated to above its final position.  The truss is built and raised upside down as the top cord is longer thus heavier.


The truss near its final position.  A few scoots with a pry-bar and all will be good.


Welding the truss in place.  Note the OSHA approved knee lock to secure me to the outside of the scaffold.

Steel rising

Started erecting the steel today for the shop roof supports.  The two corners of the container along the outside wall got a vertical post (5x5in box) welded onto the load point.  Back is 66in tall, front is 76in tall to maintain a 1/2-12 slope for water runoff.  Next I will put a 20ft beam (also 5x5in box) on top of the two posts.   These pics show how I got the beam on top of the container using a come-along.  The beam weighs 350lbs.  Tomorrow I will set it on top of the posts and weld it in place.  Might get another strong back to help with this – we shall see.


Using the front post to lift the beam.


Once I got the end of the post on top of the container I switched the come-along to the back post and proceeded to put the beam on to the container.


Shop & carport containers moved

Friday was a big day.  The shop and carport containers got moved onto their slabs.  We had to empty the contents prior to moving them – and then put everything back inside before it rained.  My BigBlu power hammer, which weighs 2,000 pounds, also got moved onto the slab.  I can move it into its final position by rolling it around on steel pipes.


The pile of debris is a packrat nest that was under the shop container that was just moved.  Recovered 10 of my socks, a BBQ lighter and a knife the rats had previously “borrowed”.


Jaime & Matt helping guide the carport storage container into place.

 
Looking forward to having my power hammer running again soon.

Dirt & concrete

What a busy week!  The hole for the septic tank and part of the leach field were excavated so we could use the dirt to back fill the shop and carport stem walls.  Today we poured 40 yards of concrete for the shop and carport floors.  Progress!


Septic tank being lower into its hole.


Spreading the dirt from the septic tank and leach field holes.


Using a “jumping jack” to pack the dirt.  This 200lb machine literally jumps up and down to pack the dirt.  4 inches of aggregate base was then pack on top of this.  Followed by a grid of 1/2 inch rebar.


Took a quick break from construction to forge a branding iron for a client.  This is how you work when a proper anvil is not available.  I sure do miss banging on hot iron.


5:30 this morning waiting for the concrete and pump to arrive.


These guys make it look easy.


40 yards of finished concrete.   I will keep it wet for a few days so it cures harder faster.  Next week we will be craning the last two containers in place.  One for each slab.

Schlepping

Spent yesterday schlepping 7,500 pounds of floor tile from where the 5 pallets got dropped off to the “office” container – a distance of about 150 feet.   Three boxes at a time using my heavy duty hand cart.  They were in the way of where the electrical trench will be dug.  We have spent a fair amount of time moving stuff (usually heavy stuff) from one spot to another.  The challenges of a small building site.

The challenges of a small building envelope

We have kept the building envelope as small as possible to minimize disturbing our beautiful desert.  This means we have to do some projects in a specific order.   We needed dirt to backfill the stem walls of the shop and carport.  We had an excavator dig the hole for the septic tank and part of the leach field and put the dirt inside the stem walls.  They couldn’t dig the entire leach field (12 by 45 feet) because there is not enough room to store the dirt and still allow room for the concrete truck and pump that we need to pour the floors of the shop and carport.  Once the floors are poured we can move the two containers and our trailer on to the floors.  This will give us room to dig the trench for the electrical conduit so we can get APS power.  Then we can go back to the septic system and finish it.

Stem Walls

Got the stem wall forms up for the shop and carport.  Needed to back fill the trenches.  No room for a bobcat to haul the dirt to the back side so I used my ancient wheelbarrow.  The easiest way to shovel the very rocky soil is to use the trail rake to pull the dirt/rocks into a loose pile and then shovel it into the wheelbarrow.

Total of 16 yards of concrete.  The first truckload (10 yards) went perfect.  The concrete in the second truck was a tad runnier than the first.  All was going well until the excess moisture caused the OSB forms to split and partially give way.  Some fast reinforcement with scrap 2in square tubing and we finished the pour.  The back side of the carport will have an “organic” look to it.  I will do some creative stone work to make it artistic.

More concrete and a big pole

Last Tuesday we poured 15 yards of concrete for the shop and carport footers.  Now we start work on the stem wall forms which range in height from 1 to 4 feet.  We have poured just over 42 yards of concrete so far.

Today APS delivered a new steel power pole to replace the ancient wood pole.  We had to move two truck loads of iron wood and a bunch or other stuff to make room.  Getting power is still aways off.   Once the shop and carport slabs are poured we can move the last two containers into place and move our travel trailer onto the carport slab – then we will have the room to dig the trench from the power pole to the house.   One of our primary goals is to minimize the amount of natural desert that we disturb.   This requires moving a lot of heavy stuff multiple times to make room for the current portion of the project.  Builds muscle and character!